


Tiny Piano
DESCRIPTION
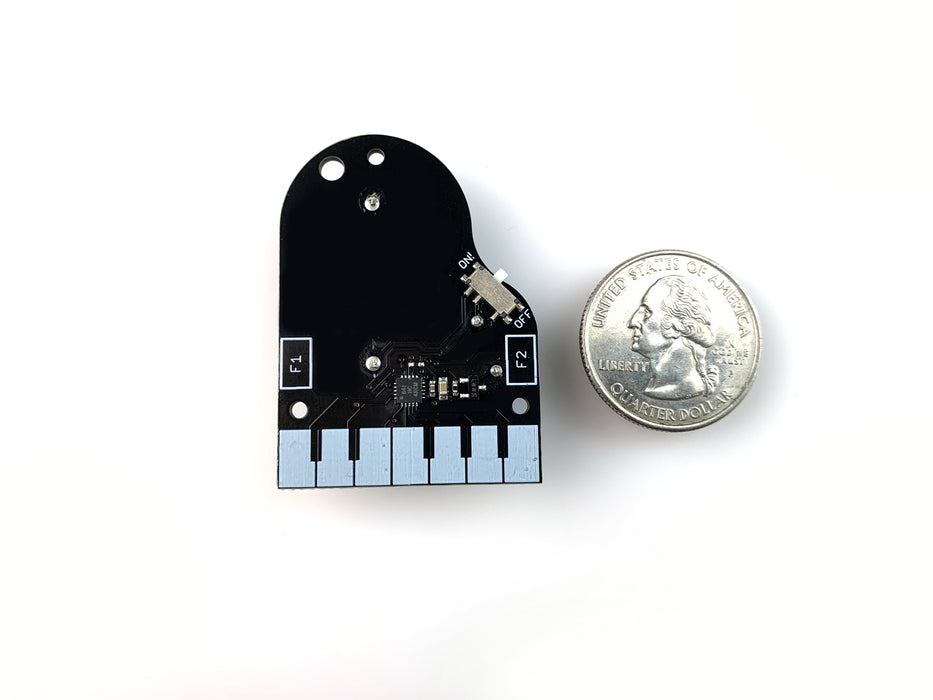
Compose a tiny tune with the new TinyPiano! Built around the ATtiny841 microcontroller, this product features 9 capacitive touch sensors, 10 pre-loaded Nokia style ringtones, a loud magnetic buzzer, and simple coin cell power. Seven of the capacitive touch sensors are piano keys and play different pitches. On either side of the keyboard is a function touch pad. Touching the lower pad while playing the keys will result in a lower octave. The high pad will give you a higher octave. Touching both function keys at the same time will play one of 10 randomly selected ringtones!
TECHNICAL DETAILS
ATtiny841
- 8 KB Flash Memory
- 512 Bytes SRAM and EEPROM
- Voltage: 1.7V - 5.5V
Dimensions
- 33mm x 44mm x 12mm (1.30 inches x 1.73 inches x 0.47 inches)
- Weight: 9.5 grams (.335 ounces)
Notes
- The TinyPiano uses an ATtiny841 Microcontroller, but since it doesn't have USB support, it is not re-programmable without some serious hacking.
- The tunes programmed on each TinyPiano are randomly selected during manufacturing from a set of 200 tunes. Most examples of TinyPiano are unique!
Assembly
Follow the instructions and pictures below to assemble your TinyPiano.

Materials:
- Three (3) plastic screws
- Three (3) plastic nuts
- One (1) CR2032 Coin Cell Battery
- One (1) TinyPiano circuit board
1. Place the 3 screws down through the 3 small holes in the TinyPiano circuit board.

2. Place 3 nuts onto the 3 screws and tighten them down against the circuit board. These create the " piano legs".

3. Place the coin cell battery in it's clip. Now make music!
